
MOTHMAN
Senior Thesis Short Film 2024
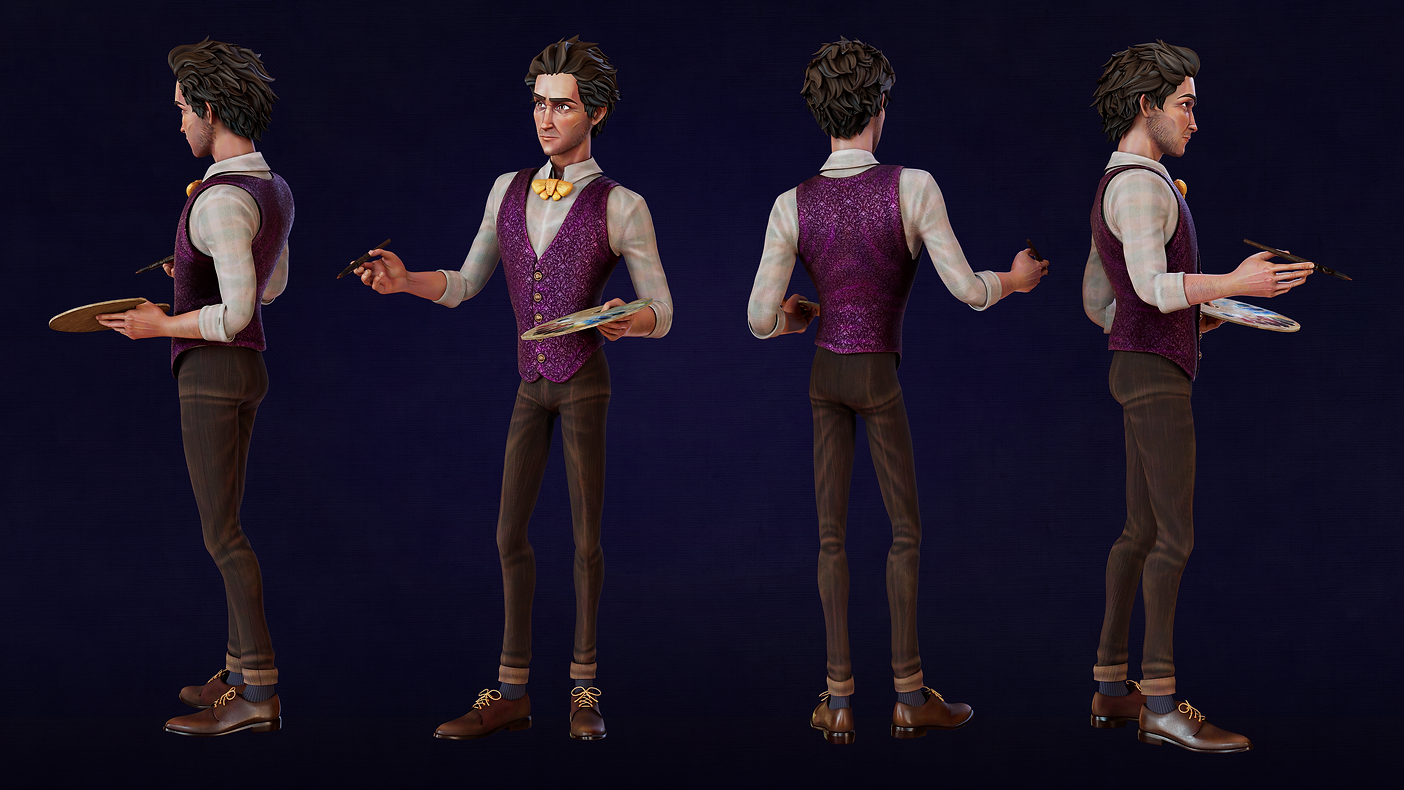
Painter Character Model
Model sculpted in ZBrush
Retopologized and UVed in Maya
Textured in Adobe Substance 3D Painter
Rendered in Arnold

Concept Art
All concept art created by Avery Buffington
Process
In August of 2022 pitching began for the Class of 2024 senior capstone projects. Very early on in the process we knew on the pitch team that we wanted to create a protagonist that reflected the feeling of being eaten away at by your artistic ambitions and perfectionism. We wanted the portrait of a tortured artist who wasted away in service of their craft. We pictured a man who would start out as refined and degrade over time into a shell of his former self, hollow, and maybe a bit scruffy around the edges. Someone who is burning the candle at both ends.
Beginning Concepts
A lot of debate happened over what the Mothman would look like over many weeks. Picking a specific moth species would inform our character's personality, color palette, and the overall mood of the film, and how much we wanted to deviate from other previous Mothman designs in other media and art.

Initial Sketches
After getting a rough idea of our story and visual design inspirations, we prepared for pitch day by putting together some of our favorite initial reference inspirations, and sketches from various members of the pitch team.


Once our pitch was selected and greenlit for production, the production team and I refined the traits we desired most from the pitch sketches. We wanted to combine the colors and mood of the concept art done by myself, and combine it with the more refined sensibilities of the fancy dress of the concept art by Aelma Azad.


Before beginning the character sculpt, our team decided we wanted to opt for geometry clothes and have them be as form fitted to the body as possible to eliminate the need for cloth simulations and reduce interaction of the clothes with itself.
Character Sculpt
The first few iterations of the model were quite rough and I had a hard time nailing down how stylized I wanted the face to look. I was having a difficult time finding my way out of the uncanny valley in the first few iterations. I sourced a lot of reference for stylized sculpts online through Art Station and Instagram to determine how harsh and sharp the changes in form should be on the face. How sharp are the cheekbones? Is there a defined edge to the sides of the nose? How big are the eyes? How sharp is the jawline? These were difficult questions I had to find the answers to myself through a lot of trial and error. Being the original concept artist AND the character sculptor meant that I had a lot of self doubt about my own design choices. What I had put on paper felt right at the time of drawing it, but it proved to be difficult to translate it in 3D without having someone else to point me in the right direction. I was my own guide through the uncanny valley.


I made some additional art and tried to pose the Painter in a 3/4 view to better envision what the forms of the body would look like in 3D which helped with getting some of the proportions right.
Hair
The first time I really felt solid about the character appeal was in an iteration where I softened a lot of the extremely harsh lines and ridges on the face. I tried to achieve a contrast and ballance between an overall stylized look with some sharp edges around the eyes, nose, and mouth, however leaving some resting space around the rest of the face that was a lot softer and rounded than prior iterations. The shape is still quite stylized, however I let go of a lot of the polished and pinched edges that were creating too gaunt and creepy of a design.

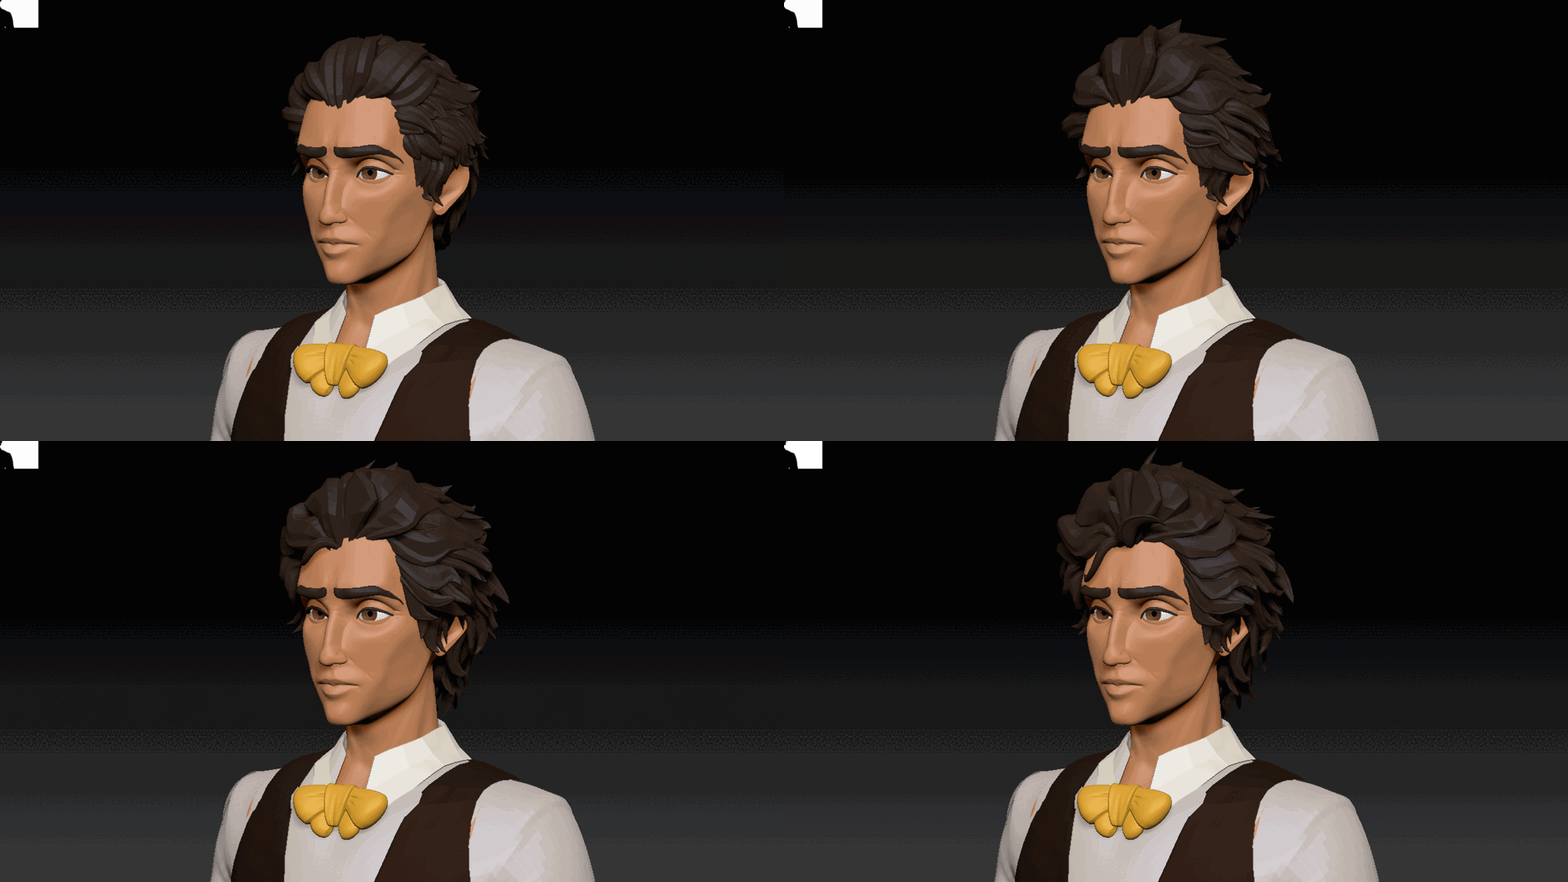
Around the same time, I also scrapped the hair I made by trying to stretch out and taper ZSpheres into my desired shape, and pivoted to using ZCurve hair tools and a hair template to create a hairstyle that evolves and changes which would be built into the rig with a slider. This would allow animators to select which version of the hair they would like to use to better communicate the passage of time and the mental state of the character.


During this time, I was also testing and developing what the Mothman creature version of the Painter would look like in conjunction with the human version.
While this is not the final version we ended up going with. It is interesting to see my own thought process when it came to elevating the hair and features beyond the human version.
Final Model
By this time in the semester, the pressure was really on to get a model out to rig and animate. Thankfully, I felt super confident with this new design. After a couple of short hours of sculpting, I had a very solid base for what the character would look like. What had previously taken me many hours of frustration and fiddling around with subtools in ZBrush now felt like a breeze.


Retopology & UVs
Retopology went fairly quickly, especially considering the clothing had been reused from the Painter model and just refitted on the model in ZBrush but retained the same geometry and textures. The hands and head were relatively simple. The feet were the most complex element to retopologize by hand due to their unique shape which presented some interesting challenges resolving geometry around the four talons. The hair and the thorax were too complex in silhouette to retopologize by hand in the time left to complete the model, so ZRemesher had to make due.


Texturing
When starting the texture I first made a quick blockout of potential textures and colors to present to my group that deviated slightly from the initial concept art. Over the course of production our colors leaned more heavily into purples so I thought it would be a nice pop of interesting color to change the vest color from brown to purple. I laid out some quick patterns on the vest and bow and placed some smart materials around the model to get a general feeling of the look.


I was having some issues with the high poly to low poly bake in Substance Painter so I reached out to some peers and experts and learned a lot about bake settings in Painter more than I had ever known. I had difficulty with shadows of particular items baking artifacts and shadowing down on to nearby items. I went back and made sure all my naming conventions matched. I also attempted to make a bake cage which proved to be very difficult for a character with a lot of small objects overlapping each other like hair and shoelaces. Eventually my solution was to texture on the high poly model due to time constraints and apply the texture to the low poly mesh in Maya.
When going back in to texture the final version of the model, I made some very detailed custom smart materials for the skin, hair, shirt, vest, bow, pants, shoes, and socks.


I think the texture came out alright. I like how detailed and high contrast it is. I think the colors fit very well with the overall aesthetic of the short film. This is the first stylized character I've ever textured and it was an interesting experience trying to blend my background of realistic texturing with the stylized direction of the film.
In retrospect, I would have liked for the painterly effect to be stronger and more visible from farther away rather than a subtle color layer on top of other clashing materials. I would like the lines and details on the face to be a bit more blurred and brushed on, and I would like the pants and the vest to be less detailed. One thing that is common in my other texturing is a lot of height and roughness variation to achieve a realistic style, however in this instance I think it would have been more effective to have a more detailed model but have very flat surfaces and very high roughness to let the painted strokes be the main focus of the texture.
Final Renders

Reflection
This project represents my longest undertaking in a production setting to date. I had many challenges and setbacks that made completing this piece very daunting and sometimes overwhelming. This was the first character model I created in a collaborative production pipeline and it was the first full-body human model I had ever created that was fully retopologized and textured. Throughout the process of making this character model I learned a lot about the different steps of making a riggable character model and the various pitfalls of moving from one program to another and how it can affect the model downstream in production.
I am proud of the final model and the effort I put into it and the large amount of learning and growth that this project was able to give me. I made a LOT of mistakes making this model moving from ZBrush to Maya to Substance that slowed me down but I ultimately learned from each step. Admittedly there are many things that if revisited I would like to improve on, I think this character model represents a large amount of personal growth in my ZBrush literacy, character topology, and understanding of technical texture limitations. I would love to give the textures and materials another shot to be more cohesive and go much stronger on the painterly effect now that I feel comfortable with handling a lot of geometry and UVs and materials.
I look forward to seeing how my future character models will be influenced by what I learned making this character model.


